Quick Answer
Start with the four major lines in a fixed order — life, heart, head, then fate — noting each one's length, depth and any breaks or forks before moving to the next. Read both hands and compare them. This sequence gives a coherent first pass without needing to memorize dozens of markings at once.
How to Read Your Own Palm: A Beginner's Guide
Last reviewed: 2026-08-21 by ReadMyPalms editorial
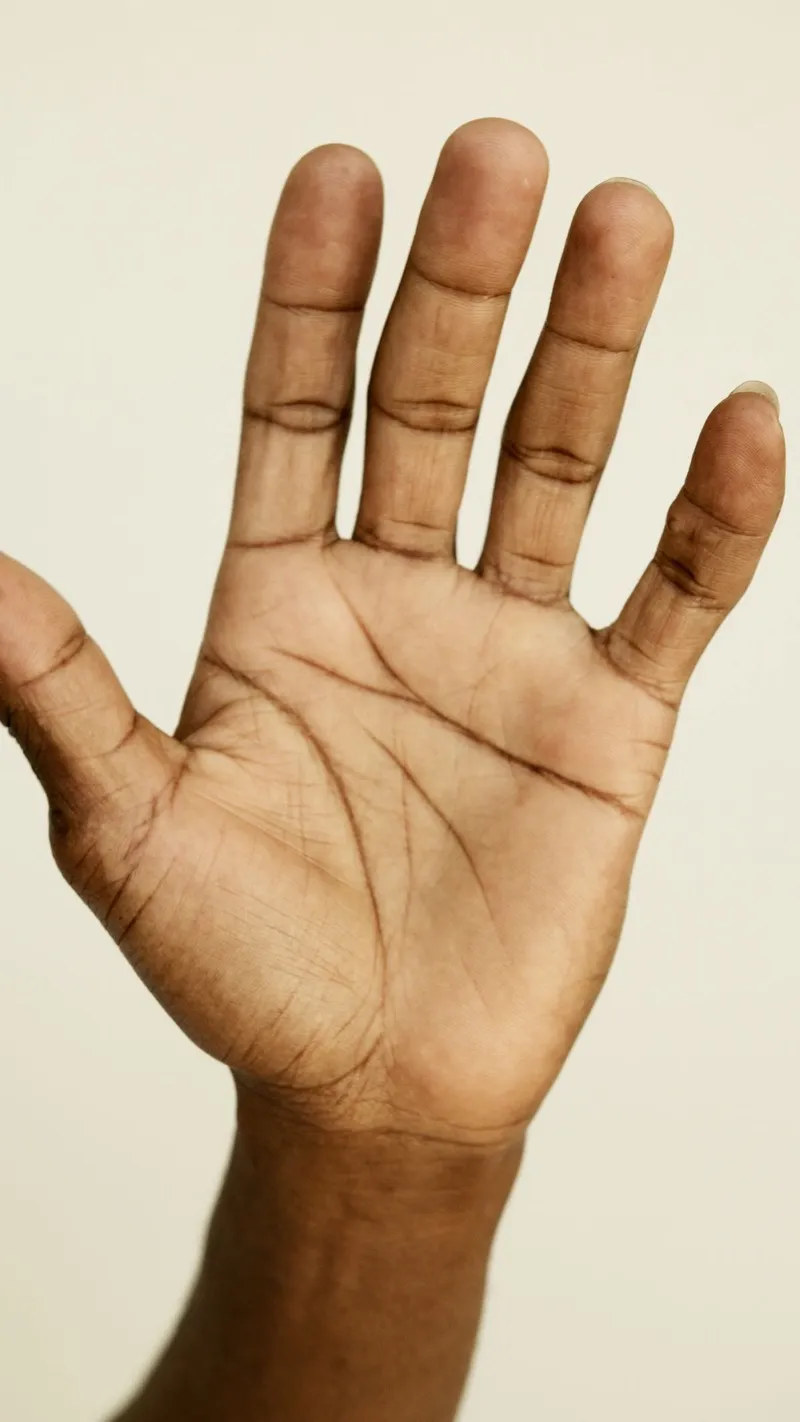
Hold your dominant hand palm-up under good, angled light — side lighting shows faint lines far better than light shining straight down. A phone flashlight held at a low angle works well.
Step 1 — find the life line
The life line arcs around the base of the thumb, from between the thumb and index finger down toward the wrist. Note whether it is long or short, deep or faint, and whether it has any breaks, forks, or a parallel sister line running inside its curve.
Remember that its length is not traditionally read as lifespan — see the short life line and broken life line pages for the fuller reading of what length and breaks actually mean.
Step 2 — find the heart line
The heart line runs horizontally across the upper palm, below the fingers, usually starting under the little finger and heading toward the index. Note whether it curves upward or runs straight, and whether it forks, breaks, or chains at any point.
A curved line is traditionally read as more openly expressive; a straighter line as more measured. Neither is read as better — see the heart-line variant pages for specifics on forks, breaks and chaining.
Step 3 — find the head line
The head line runs across the centre of the palm, starting near the thumb close to where the life line begins. Note its length, whether it is straight or curved, and whether it starts touching the life line or with a gap from it.
A straight head line is traditionally read as logical and structured thinking; a downward-curving line as more imaginative. See the head-line-connected-to-life-line page for what the starting gap specifically means.
Step 4 — find the fate line, if present
The fate line, when present, runs vertically up the centre of the palm toward the middle finger. Many palms have a faint or absent fate line — this is common and is not read negatively. See the no-fate-line page if you don't find one.
If present, note whether it runs unbroken or has gaps, and whether it starts from the wrist, the life line, or partway up the palm.
Step 5 — compare both hands
Repeat the same four steps on your non-dominant hand. Differences between the two are expected and are themselves informative — see the left-vs-right-hand page for how to read what the differences mean, rather than treating one hand as the "correct" one.
A caution on reading yourself
Self-reading is harder to do objectively than reading someone else's hand, since it is easy to see confirmation of what you already believe about yourself. Treat first impressions as a starting hypothesis, and look again after a few days rather than settling on a reading in one sitting.
Common Questions
How do I start reading my own palm?
Begin with the four major lines in order — life, heart, head, fate — noting each one's length, depth and any breaks before comparing both hands.
Which hand should I read first?
Either is fine as a starting point, but plan to read both — the comparison between them is part of the reading, not optional.
What if I can't find my fate line?
A faint or absent fate line is common and is not read negatively — see the no-fate-line page for the full reading.
How long does it take to learn to read palms?
The four major lines can be identified in one sitting. Reading the finer variations and markings accurately takes longer practice, ideally comparing many hands rather than just your own.
See this on your own palm
Upload a photo and our reader walks the four major lines on your hand, showing you where each one runs and what tradition associates with what it finds.
Read my palm — freeRelated Palmistry Topics
Life Line
The line curving around the thumb, traditionally read as vitality and life transitions.
Read the guide →Heart Line
The horizontal line across the upper palm, read as emotional life and attachment.
Read the guide →Head Line
The line across the middle of the palm, read as thinking style and decision-making.
Read the guide →Fate Line
The vertical line rising up the palm, read as direction and outside forces in life.
Read the guide →Sun Line
Vertical line associated with creativity and recognition.
Read the guide →Marriage Line
Short horizontal lines on the palm edge below the pinky.
Read the guide →